1. Introduction to GitHub Actions
What is GitHub Actions?
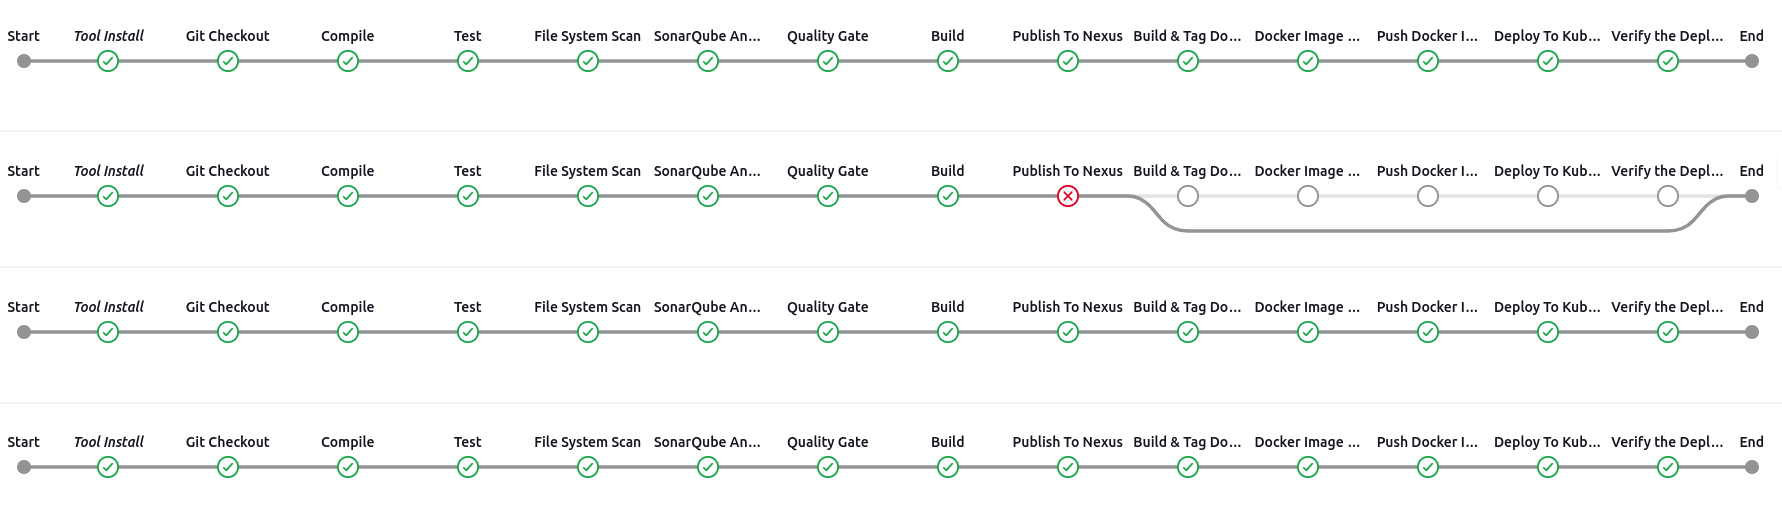
GitHub Actions is a CI/CD (Continuous Integration and Continuous Deployment) tool that allows developers to automate workflows directly in their GitHub repository. It helps automate software development processes like testing, building, and deploying applications.
Why Use GitHub Actions?
- Automate repetitive tasks in software development.
- Run tests automatically after every push.
- Deploy applications seamlessly.
- Manage workflows with GitHub-hosted or self-hosted runners.
- Integrate with third-party services (Docker, Kubernetes, AWS, etc.).
Use Cases
- CI/CD Pipelines: Automate testing, building, and deployment.
- Code Quality Checks: Run linters and security scans on every push.
- Automated Releases: Publish artifacts to package managers.
- Infrastructure as Code (IaC): Deploy infrastructure using Terraform, Ansible, or Kubernetes.
Hosted Runners vs. Self-Hosted Runners
Hosted Runners
GitHub provides virtual machines (VMs) that run jobs in a workflow. Examples:
- ubuntu-latest
- windows-latest
- macos-latest
Self-Hosted Runners
A self-hosted runner allows you to run workflows on your own infrastructure, giving you more control over the environment and resource allocation.
A GitHub Actions workflow consists of:
- name – Workflow display name.
- on – Defines when the workflow should run (events like push, pull_request, or schedule).
- env – Sets environment variables.
- jobs – Defines a list of jobs (each job runs independently).
- steps – Tasks executed in a job (e.g., checking out code, running scripts).
- needs – Specifies job dependencies; ensures a job runs only after another completes.
- runs-on – Defines the virtual machine environment for the job (e.g., ubuntu-latest, macos-latest).
- container – Runs jobs inside a specified container instead of the default virtual environment.
- services – Defines additional containers for services like databases (e.g., Redis, MySQL).
- timeout-minutes – Maximum execution time before GitHub cancels the job.
- strategy – Defines a build matrix to run jobs with different configurations (e.g., multiple OS or Node.js versions).
- fail-fast – Stops all in-progress matrix jobs if one fails.
- uses – Runs an action from a public/private repository or Docker image.
- with – Provides input parameters for actions.
- if – Conditional execution of a step or job based on an expression.
- run – Executes shell commands directly in a step.
- artifact storage – Stores and shares files between jobs using upload-artifact and download-artifact.
- caching – Speeds up workflows by caching dependencies with actions/cache.
- context and expressions – Uses expressions (${{ }}) to reference variables, secrets, and runtime information.
Here’s the structured, parent-child syntax sequence for GitHub Actions workflow components, with each component explained in terms of its relationship to others. This will give you a tree structure to help understand how these parts fit together:
| Workflow ├── name # (Parent: Workflow) – Display name of the workflow. ├── on # (Parent: Workflow) – Defines when the workflow runs (e.g., push, pull_request). │ └── push#(Child:on)-Examp of an event that triggers the workflow when a push is made to a branch. │ └── pull_request#(Child:on)-Example of an event that triggers the workflow on a pull request. ├── env # (Parent: Workflow) – Sets environment variables accessible throughout the workflow. ├── jobs # (Parent: Workflow) – Defines the jobs in the workflow. │ └── job_name # (Child: jobs) – Each job that runs in parallel or sequentially. │ ├── runs-on #(Parent:job_name)-Defines the VM environment for the job (e.g., ubuntu-latest). │ ├── container # (Parent: job_name) – Specifies if the job should run inside a container. │ ├── services # (Parent:job_name)-Defines services (Redis, MySQL) required for the job. │ ├── timeout-minutes # (Parent: job_name) – Defines the max execution time for the job. │ ├── strategy #(Parent:job_name)-Defines a build matrix to run jobs with multiple config. │ │ └── matrix # (Child: strategy)-Matrix configurations (e.g., multiple OS or versions). │ ├── steps # (Parent: job_name) – The list of steps to execute in the job. │ │ ├── name # (Parent: steps) – Descriptive name for each step. │ │ ├── uses # (Parent:steps)-Runs an action from a pub/private repo or Docker image. │ │ ├── with # (Parent: steps) – Input parameters for the action. │ │ ├── run # (Parent: steps) – Run shell commands directly in the step. │ │ ├── if # (Parent: steps) – Conditional execution of a step based on expressions. │ │ ├── artifact storage#(Parent:steps)-Defines storage,upload-artf, download-artifact. │ │ ├── caching # (Parent: steps) – Caches dependencies with actions/cache. │ │ └── context and expressions #(Parent:steps)Uses expressions for dynamic variables, secrets, etc. └── needs # (Parent: Workflow, job_name) – Specifies job dependencies, ensuring jobs run in order. └── job_name # (Child: needs) – The job that must finish before the current job can run. |
2. Understanding GitHub Actions Workflow Syntax
A GitHub Actions workflow is defined using YAML files stored in .github/workflows/.
Here are practical examples for each component of the GitHub Actions workflow, with explanations for each parent-child relationship:
1. name (Parent: Workflow) – Display name of the workflow
This is the name of your workflow.
| name: CI/CD Pipeline |
2. on (Parent: Workflow) – Defines when the workflow runs (e.g., push, pull_request)
| on: push: # (Child: on) – Trigger when a push is made to a branch branches: – main # Trigger only when changes are pushed to the ‘main’ branch pull_request: # (Child: on) – Trigger when a pull request is created or updated branches: – main # Trigger for pull requests targeting the ‘main’ branch |
3. env (Parent: Workflow) – Sets environment variables accessible throughout the workflow
| env: GLOBAL_ENV_VAR: value # Global environment variable available in all jobs |
4. jobs (Parent: Workflow) – Defines the jobs in the workflow
Each job can be executed independently.
| jobs: build: # (Child: jobs) – The ‘build’ job defined here runs-on: ubuntu-latest # (Parent: job_name) – Specifies the virtual environment for the job |
5. runs-on (Parent: job_name) – Defines the virtual machine environment for the job
| jobs: build: runs-on: ubuntu-latest # (Parent: job_name) – Runs the build job on the latest Ubuntu environment |
6. container (Parent: job_name) – Specifies if the job should run inside a container
| jobs: build: container: image: node:16 # (Parent: job_name) – Use Node.js version 16 inside a Docker container steps: – name: Checkout code uses: actions/checkout@v2 |
7. services (Parent: job_name) – Defines services like databases required for the job
| jobs: build: services: redis: # (Parent: job_name) – A Redis service required for the job image: redis:alpine ports: – 6379:6379 |
8. timeout-minutes (Parent: job_name) – Defines the max execution time for the job
| jobs: build: timeout-minutes: 30 # (Parent: job_name) – Set the timeout to 30 minutes for the build job |
9. strategy (Parent: job_name) – Defines a build matrix to run jobs with multiple configurations
| jobs: build: strategy: matrix: os: [ubuntu-latest, macos-latest] # (Child: strategy) – Run the job on both Ubuntu and macOS node_version: [14, 16] # (Child: strategy) – Test with Node.js versions 14 and 16 runs-on: ${{ matrix.os }} # Use the OS defined in the matrix |
10. matrix (Child: strategy) – Matrix configurations (e.g., multiple OS or versions)
| strategy: matrix: os: [ubuntu-latest, macos-latest] # (Child: strategy) – Define the OS configurations node_version: [14, 16] # (Child: strategy) – Define the Node.js versions to test |
11. steps (Parent: job_name) – The list of steps to execute in the job
| jobs: build: steps: – name: Checkout code # (Parent: steps) – Check out the code repository uses: actions/checkout@v2 |
12. name (Parent: steps) – Descriptive name for each step
| steps: – name: Checkout repository # (Parent: steps) – This is a descriptive name for the step uses: actions/checkout@v2 |
13. uses (Parent: steps) – Runs an action from a public/private repository or Docker image
| steps: – name: Set up Node.js # (Parent: steps) – Set up the Node.js environment uses: actions/setup-node@v2 # (Parent: steps) – Uses the setup-node action with: node-version: ’16’ # (Parent: steps) – Specify Node.js version |
14. with (Parent: steps) – Input parameters for the action
| steps: – name: Set up Node.js uses: actions/setup-node@v2 with: node-version: ’16’ # (Parent: steps) – Specify Node.js version |
15. run (Parent: steps) – Executes shell commands directly in the step
| steps: – name: Install dependencies # (Parent: steps) – Install dependencies for the project run: npm install # (Parent: steps) – Run the shell command to install dependencies |
16. if (Parent: steps) – Conditional execution of a step based on expressions
| steps: – name: Run tests # (Parent: steps) – Run tests conditionally if: ${{ success() }} # (Parent: steps) – Only run this step if the previous step was successful run: npm test |
17. artifact storage (Parent: steps) – Defines artifact storage, e.g., upload-artifact, download-artifact
| steps: – name: Upload build artifact # (Parent: steps) – Upload build artifacts for later use uses: actions/upload-artifact@v2 with: name: build-artifact path: ./build/output # (Parent: steps) – Upload the files from the ‘output’ directory |
18. caching (Parent: steps) – Caches dependencies with actions/cache
| steps: – name: Cache Node.js dependencies # (Parent: steps) – Cache dependencies for faster builds uses: actions/cache@v2 with: path: node_modules # (Parent: steps) – Cache the ‘node_modules’ folder key: ${{ runner.os }}-node-modules-${{ hashFiles(‘**/package-lock.json’) }} # (Parent: steps) – Cache key based on package-lock.json |
19. context and expressions (Parent: steps) – Uses expressions for dynamic variables, secrets, etc.
| steps: – name: Deploy to production # (Parent: steps) – Deploy to production only if it’s the main branch if: github.ref == ‘refs/heads/main’ # (Parent: steps) – Run this step only if the branch is ‘main’ run: | scp -i ${{ secrets.SSH_KEY }} ./build user@server:/path/to/deploy # (Parent: steps) – Use SSH secret to deploy |
20. needs (Parent: Workflow, job_name) – Specifies job dependencies, ensuring jobs run in order
| jobs: build: runs-on: ubuntu-latest steps: – name: Checkout code uses: actions/checkout@v2 deploy: needs: build # (Parent: needs) – This job will only run after ‘build’ job completes runs-on: ubuntu-latest steps: – name: Deploy application run: echo “Deploying to server” |
21. job_name (Child: needs) – The job that must finish before the current job can run
| jobs: build: runs-on: ubuntu-latest steps: – name: Build project run: npm run build deploy: needs: build # (Child: needs) – The ‘deploy’ job depends on the ‘build’ job runs-on: ubuntu-latest steps: – name: Deploy to production run: npm run deploy |
These individual examples should give you a clear understanding of each component and how it fits together in a GitHub Actions workflow. You can copy these into a .yml file and experiment with them to build your practical understanding.
3. Step-by-Step Practical Guide
Step 1: Creating a Simple GitHub Actions Workflow
- Navigate to your GitHub repository.
- Create a .github/workflows/ directory.
- Create a new workflow file, e.g., ci.yml.
- Add the following basic workflow:
| name: Simple CI on: push jobs: build: runs-on: ubuntu-latest steps: – name: Checkout Code uses: actions/checkout@v3 – name: Print Message run: echo “Build Successful!” |
Step 2: Running Jobs in a Self-Hosted Runner
- Install a GitHub self-hosted runner on your machine.
- Register the runner in GitHub.
- Use it in a workflow:
| jobs: self_hosted_build: runs-on: self-hosted steps: – name: Print Machine Name run: hostname |
Step 3: Running Tests in Docker
| jobs: test: runs-on: ubuntu-latest container: image: python:3.9 steps: – name: Run Python Test run: python –version |
Step 4: Deploying to Kubernetes
| jobs: deploy: runs-on: ubuntu-latest steps: – name: Setup Kubectl uses: azure/setup-kubectl@v1 – name: Apply Deployment run: kubectl apply -f deployment.yaml |
Complete pipeline example for a web application. This pipeline covers the following stages:
- Checkout the code.
- Set up dependencies (Node.js, Python, etc., based on the web app’s tech stack).
- Run tests.
- Build the web app.
- Deploy the web app.
- Notify on success or failure.
| name: Web App CI/CD Pipeline # This pipeline is triggered by a push to the main branch or any feature branches on: push: branches: – main # Trigger on push to the main branch – ‘feature/*’ # Trigger on push to any feature branch pull_request: branches: – main # Trigger for pull requests to the main branch jobs: # Job 1: CI – Continuous Integration (Build & Test) ci: runs-on: ubuntu-latest steps: # Step 1: Checkout the repository code – name: Checkout repository uses: actions/checkout@v2 # This checks out the code so that the next steps can use it # Step 2: Set up Node.js environment – name: Set up Node.js (for Node.js-based web apps) uses: actions/setup-node@v2 with: node-version: ’16’ # Set the desired Node.js version # Step 3: Install dependencies – name: Install dependencies run: | npm install # Install dependencies from package.json (or use yarn) # Step 4: Run tests – name: Run tests run: | npm test # Run your test suite (adjust if you’re using a different testing framework) # Job 2: Build – Build the web app build: runs-on: ubuntu-latest needs: ci # This job depends on the ci job; it will run after successful tests steps: # Step 1: Checkout the repository (same as in the previous job) – name: Checkout repository uses: actions/checkout@v2 # Step 2: Set up Node.js again (required for build) – name: Set up Node.js uses: actions/setup-node@v2 with: node-version: ’16’ # Make sure to use the same Node.js version # Step 3: Install dependencies (again, in case some are needed for the build) – name: Install dependencies run: | npm install # Step 4: Build the application – name: Build the web app run: | npm run build # Adjust this to your build command (e.g., webpack, create-react-app, etc.) # Job 3: Deploy – Deploy the web app to a server (e.g., AWS, DigitalOcean, etc.) deploy: runs-on: ubuntu-latest needs: build # This job depends on the build job; it will run after a successful build steps: # Step 1: Checkout the repository – name: Checkout repository uses: actions/checkout@v2 # Step 2: Set up environment variables (optional) – name: Set up deployment secrets run: echo “DEPLOY_KEY=${{ secrets.DEPLOY_KEY }}” >> $GITHUB_ENV # Example for a deploy key (add your secret to GitHub Actions secrets) # Step 3: Deploy to server (adjust to your deployment method) – name: Deploy to server run: | # Example: Using SSH to deploy via SCP or rsync ssh -i ${{ secrets.DEPLOY_KEY }} [email protected] ‘cd /path/to/your/web/app && git pull && npm install && pm2 restart app’ # Or use any other deployment tool (e.g., FTP, SFTP, AWS CLI, etc.) # Job 4: Notify – Send notifications after the pipeline runs (success or failure) notify: runs-on: ubuntu-latest needs: deploy # This job depends on the deploy job steps: # Step 1: Send success or failure notification – name: Send notification on success/failure run: | # Check if the workflow was successful or failed if [[ $GITHUB_RUN_STATUS == “success” ]]; then # Send success notification (e.g., to Slack) curl -X POST -H ‘Content-type: application/json’ \ –data ‘{“text”:”Build and deployment successful!”}’ \ https://hooks.slack.com/services/YOUR/SLACK/WEBHOOK else # Send failure notification (e.g., to Slack) curl -X POST -H ‘Content-type: application/json’ \ –data ‘{“text”:”Build or deployment failed. Please check the logs!”}’ \ https://hooks.slack.com/services/YOUR/SLACK/WEBHOOK |
4. Conclusion
This guide provides a structured approach to learning GitHub Actions from basic syntax to advanced use cases. By following these steps, you can create robust CI/CD pipelines using GitHub-hosted and self-hosted runners.
For more details, refer to the GitHub Actions Documentation.